Monday, May 4, 2015

DIY Sunglasses to match every outfit!


I like to match. I would love to have designer sunglasses that match every outfit. I would also like to travel to all sorts of exotic places with my designer sunglasses on my own private jet. Obviously, neither one is happening. But what I do have is endless creativity, access to cheap sunglasses and an overflowing craft stash. So I will make sunglasses to match every outfit! 

I searched the Internet looking for ideas on DIY websites and designer websites. Then I searched through the craft stash and nail polish (yes, nail polish!) to see what I could come up with. Then, it was off to find some cheap sunglasses. I hit the Dollar Tree and Five Below and found some cheap glasses. I wasn't quite ready (or willing) to try my newfound ideas on nice sunglasses - yet.

First, I tried my hand at gluing stuff on my glasses. This is so easy, even the craftily challenged can handle this! I got a black pair of sunglasses at the Dollar Tree and an old pair of clip on earrings. 


Using my wire cutters, I snipped off the earring backs, then I spread some E6000 (the stuff glues ANYTHING) on both the backs of the earrings and the temples of the glasses with a toothpick, waited about two minutes then stuck them together. 

And voila! Sparkly and rizty! Tres chic, no?


I found a pair of my daughter's old sunglasses and glued on some beads from an old bracelet to create these:


I glued some hematite stars I had leftover from a bracelet I made and now I have sunglasses that match it!


I found some old stretch bracelets that lost their stretch. I just glued those babies on these pairs:

I found some seashell beads and starfish beads along with some seafoam seed beads and came up with these beach worthy beauties:


I then tried my hand at nail polish. I grabbed another pair of black sunglasses and nail polish in an awesome glittery purple. Since I sometimes (ok, a lot of the time) suck at staying in the lines when I paint, I taped off the lenses with painters tape.


I painted just the front with the nail polish. I did three coats. I still felt it needed a little extra oomph, so I added a flower button to each temple. 


I needed a red pair, so I grabbed these tortoise shell glasses, taped off some lines and polished away. The polish was a bright, screaming red, but I guess the tortoise shell was too dark and it came out more of a brick red. I still like them though.


I made a beaded pair by brushing the top half with glue, rolling them in seed beads, letting them dry then topping them off with a coat of decoupage to keep the beads in place.
Thankfully, they were only a dollar. They look like a Pinterest fail! Looks like they're topped with fish eggs. Ick.


So, I tried again with coral nail polish with a white glitter top coat. This is what I was going for!


I did a second pair using just a pink glitter top coat. I like bling.


I wrapped the sides and nose piece of these aviators with embroidery floss. I first did a pair in red, then mixed it up with stripes. I hate them both. I think they look stupid. I might just rip off the embroidery floss and use nail polish.


I'm ready to try my hand on some (slightly) more expensive glasses. Plus, I haven't tried washti or fabric tape and I want to decoupage some book pages on the earpieces! And my daughter has commandeered half of my new sunglasses! But I'm rocking the ones she left me!

Until the next project, 
Chris :)

Wednesday, April 22, 2015

2 Necklaces, 4 Brooches from a $1.00 bag of broken jewelry!

As I was wandering around at a craft show one day, I spotted a vendor with all kinds of vintage jewelry. I love vintage jewelry. As I was lusting over the gorgeous necklaces, bracelets and earrings, I saw a box with bags of broken jewelry for a dollar. I love the Etsy shops that sell upcycled vintage jewelry and figured, for a buck, why not give it a shot? If I screw up, I'm only out a  dollar!

I started out with the necklaces. They are your typical rhinestone chokers. I love the ones painted with nail polish in different colors. This one had a broken clasp, which was easy enough to fix. I decided to paint it red (I know, I know, what a surprise). I did all one color because I like red and I wasn't sure how neat I could be painting this small. 


 I wiped the necklace down with a little rubbing alcohol, then painted away. I just dabbed the polish on. I did two coats, just like my toes. The other necklace was actually a broken bracelet I just added jump rings and ribbon to after I painted the rhinestones pink to match the ribbon. They turned out great! I want to find another cheap one and try it in multiple colors!


Next, I tackled the brooches. They all had working pin backs, but they were missing rhinestones and the finish was kinda meh. The first one is a gold arrow pin.


I just pried out the rest of the rhinestones with an X-acto knife, hit it with some silver spray paint, and glued in rhinestones I scavenged from other pieces in my dollar bag. For all these brooches, I used E6000 glue and a toothpick. I love this stuff, but it is strong. Like "don't use this in a closed room or you'll start hallucinating" strong.


Since my camera sucks, I could not get a really good picture of this one. I thought I really wouldn't like this, but now that it's done, I love it! You can't really tell that I used clear, blue and purple rhinestones in it. I really need a new camera, but I need a new car more!

Next up was this "beauty". At one time, I'm sure it was considered gorgeous. Many years ago. But not now.


I pried out the gems, hit it with silver spray paint and glued in black and gray crystals I 
had in my craft stash.


I'm still not 100% loving this. But it looks much better than it did!

This poor thing was badly discolored, but the rhinestone still looked great! Instead of spray painting it, I decided to try nail polish instead. I used OPI Brisbane Bronze. I love the color, but it doesn't do much for my toes.


Looks better on the brooch than on my toes! I think it turned out fantastic! Again, my camera sucks, so you don't get the full awesomeness.


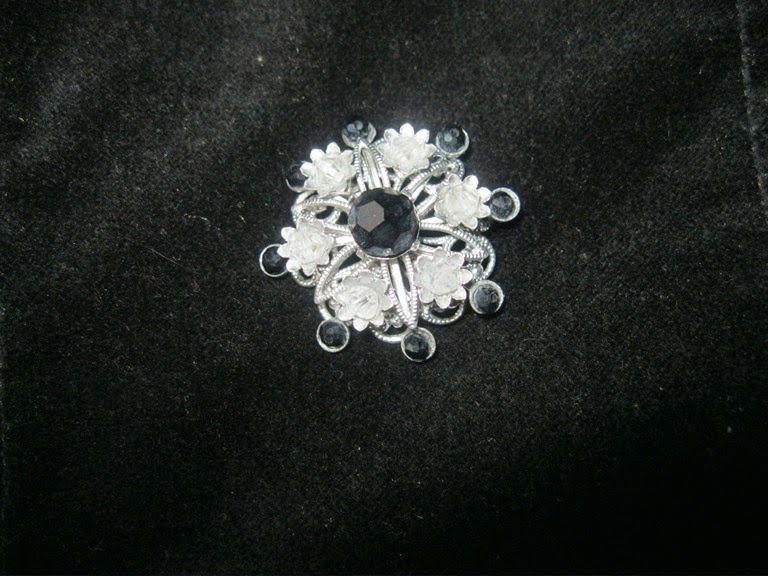
Finally, my favorite piece. The finish still looked great and it only had a few rhinestones missing, but I couldn't find enough rhinestones to fill in. So I pried out those bad boys and went glue happy with some pearls I found in my stash. Yes, I have a lot in my stash. Hopefully, there are no dead bodies in there.


I love it more with the pearls than the rhinestones! 


For the most part, I'm pretty happy with the way these turned out. I'm not all that thrilled about the black brooch or the pink necklace, but I got 3 pieces I really like and I got to try something new. Not bad for a dollar! I can't wait to find more broken jewelry I can upcycle into new pieces!

Until the next project, 
Chris :)

Wednesday, April 8, 2015

The DIY Hanging Lamp That Almost Wasn't!

I have FINALLY completed my biggest project so far. A hanging lamp. Made with fortune tellers. The origami kind, not the human kind. It was definitely a learning experience. 


This is kinda how the whole thing went:


Now that it's done, I love it! But it took a lot of trial and error (and swearing) to finish it and fall in love with it! At one point, I ripped it apart and started over! But I'm glad I stuck with it because now I have a truly unique hanging lamp!

This is my inspiration. I wanted something different, obviously. But I decided to do this as a drum shade.


This is how mine turned out:


I love it! And once I figured out what I was doing, it was easy! I used some rabbit fencing we had left over from our garden, a  lamp kit that I had bought and never used, some wire, scrapbook paper and a glue gun. I bought the scrapbook paper when it was on sale 12/$1.00,  which was great, because at one point I scrapped most of my fortune tellers and started over. The lamp cost me a grand total of $9.00; it would've cost less if I hadn't had to redo part of it!


I started by shaping the wire into a cylinder, then "sewing" the ends closed with some floral wire from the dollar store.


I overlapped the squares to make sure the ends stayed closed and the whole thing stayed round. 

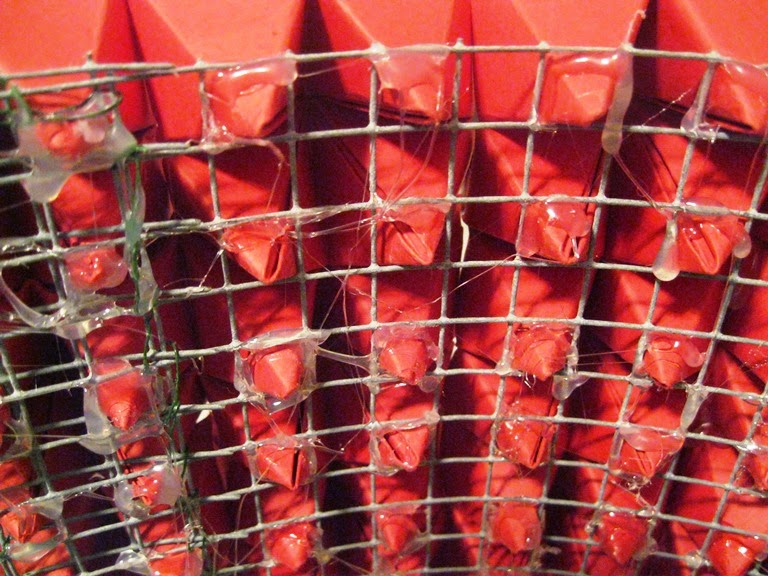
Then I attached the light kit to the wire form. I used two pieces floral wire (also from the dollar store) and made a loop in each one that fit in between the lamp base and the screw ring.


I then attached it to the wire form. This took a bit of finagling to get it to hang level.


Next, I made my fortune tellers. Pretty easy, actually. It just took a bit of time. I took pictures of the fortune teller process, but my camera hates closeups. They came out looking like you need glasses to bring them in focus. And it drives me crazy when they look fine on the camera, but terrible when you download them. I found these directions at Vintage-Toys.co.uk


I used 12x12 sheets of the cardstock scrapbook paper instead of an 8 1/2x11 sheet. I cut each sheet into four 6x6 squares and folded away. Look at how cute they all look! I did not resist the urge to sit and play with them, which took up a few minutes (or so) of my time.

Then I got my form and started hot gluing the fortune tellers on. Let me just say you could use a regular drum shade instead of making one, but I am cheap and I challenge myself to find and recycle what I can. 


I put the tips of the fortune tellers through the squares in the wire and glued them from the back. I used the squares to align the fortune tellers. 


After a bit, I noticed the fortune tellers looked haphazard and squished. This is when I first started to wonder if this would work out. I tore out the fortune tellers and started again, this time aligning them differently. No dice. They still looked squishily haphazard. I tried again. Still no go. I was highly irate. I gave myself a bit (like a few weeks) to calm down and rethink this through.


After a few weeks, I thought it might be that the cardstock was too stiff, so before I went out and bought more scrapbook paper, I tried regular printer paper. And discovered that size DOES matter! Haha! I realized that when I made my fortune tellers out of the printer paper, they were smaller and therefore fit much nicer! Instead of 6x6, I made them 5x5. So I made more and started hot gluing again. Life was once again sunny and happy. 

I had a small gap (two squares of wire) at the end of the row. I glued in a strip of paper and figured I'd turn that side to the wall. I only needed about twenty four more fortune tellers when I ran out of paper. So I traipsed off to the craft store for more, never dreaming my happy little craft bubble was about to burst.


So I bought enough to finish off my lamp. I got home and realized the paper didn't match. At all. I cursed myself for buying the wrong @#%$! paper. Then I noticed the UPC label. The color and SKU code matched! No big deal, I thought. I'd just go find a close match. Easier said than done. After a few trips between my favorite craft stores, I finally picked the one that was the closest. After I got it home and made my fortune tellers, I realized that if I put them on all in one spot, it would be very noticeable. *&^%$#! 

I decided to take out some of the original fortune tellers in strategic spots and replace them with the new ones. You can see the difference if you're looking for it, but it's not as noticeable as one big chunk of them all together. I was finally done and ready to hang it!!

It looks awesome! Until I turn it on. As you can see...


I am going to line it...eventually. It looks great as long as I don't turn it on. And it took sooo long to finish it and then to get it hung up that I 'm just enjoying it. Plus, I am thoroughly sick of dealing with it! After a few new craft projects, I'll feel up to dealing with it again :)

Until the next project,
Chris :)
Thursday, December 4, 2014

Poster Frame Upcycled Into a Photo Board!

I recently switched my son's bedroom and my office/craft room. It didn't take me as long as I thought it would, but in the process of cleaning out the office, I was shocked to realize how much stuff I had squirreled away and forgotten! I need to get busy upcycling! 

I started with a rather large poster frame without the plexiglass. Since it's so large (42" x 30"), I didn't want to shell out the $$$ to buy such a large piece of plexiglass. Or an oversized print. I have no idea what was in it in the first place! I need something for living room and I was contemplating getting an old window to display pictures, but that would cost money. And I would prefer something that would cost less money. I have seen picture frames with a burlap background and an antique-looking clip to hold the picture, so I thought I'd try making it on a larger scale. That way, I could swap out pictures to suit holidays/seasons/moods, whatever, without having to take the frame down, undo the backing, take out the old pictures, put in the.....well, you get the picture (hahaha, pun intended).


Cool, right? I painted the frame with chalk paint in a color called "Romance". I would love to have the job of naming paint colors. Seriously. "This brown makes me think of my favorite Starbucks latte. I shall call it Warm Latte." Now that would be a fun job.

Back to the subject at hand. I went to the fabric store for a plain piece of burlap. When I got there, I found this awesome burlap with birds on branches, dotted with little red berries. I felt its siren's call and knew I had to have it. As usual, I had my stash of store coupons with me, so I got a yard of it for $4.00. I rock.


Isn't it beautiful? After I got it home, I worried that it would be too busy with the pictures, but I decided to go ahead with it anyway. I really do love this fabric. I stretched it around the backing and duct taped it down within an inch of its life.


Then, I put it back in the frame and securely taped it in the frame. Very securely. This bad boy's not going anywhere! I didn't put mounting hardware on it, because I use Command picture strips to hang my stuff. I love Command stuff because I can move stuff around as it suits me without having to worry about covering up the holes. I like to do that a lot.


So now, I go searching for clips. I figure I'm not going to find any antique clips, at least not cheap, so I while I'm at Wal-Mart, I hit the office supply aisle, thinking I can find some there and make them look antique. 

The only ones I can find are magnetic. And I'm not overly thrilled about them. Then, I spot mini-clothespins. And the light bulb goes on, so I snag them. I figure I'll glue them down. But when I start figuring how to lay them out, I realize that if I glue them down, I can only use 4x6 horizontal pictures. I'm not sure I like that. I searched the internet for some ideas and found pictures hung with clips and clothespins from wire and string. I figured I could apply the same principle to my board. 

Normally, I would just take the backing off the frame and add the twine. But I really duct-taped this bad boy down. With a LOT of duct tape. More than I wanted to peel off. Since I knew the mini-clothespins and twine aren't very heavy, I decided to use my trusty Gorilla super glue. It's truly awesome stuff.


I laid out my photos so I could figure out about where I wanted to place my twine. I then measured so my twine would be evenly spaced. Using my screwdriver, I pushed the end of my twine under the frame, securing it with a drop of glue. I used an old screwdriver, not one of the good ones. When twine and burlap threads mix with super glue, it creates one heck of a mess, although sandpaper does get it off the end of the screwdriver. Eventually.


Once I got all my twine glued, I waited a few hours for it to dry, then started hanging up pictures. The beauty of the twine is I can use different-sized pictures in either horizontal or vertical, and as many or as few as I want with out leaving gaping holes. 


I'm really pleased with the end result. Now I just have to dig out more pictures!

Until the next project, 
Chris :)

Monday, October 6, 2014

Upcycled Floor Lamp with Book Page Shade

While decorating the living room, I decided to go with a hanging light over the recliner and ditch the floor lamp. I don't want to get rid of it and I think it's kinda boring, so I decided to upcycle it for my sunroom. And again, it's free. I just used stuff from my craft stash. Seriously, I have a long way to go before I use up all the stuff in my stash. I've been buying craft stuff for years. And I keep buying more. If craft stores didn't send me so many coupons, I wouldn't have so much stuff! I figure craft stores are enabling me.

Here's the before...

Boring!


Pretty meh, right? Plus it really doesn't fit in with my new scheme. I had some leftover oil-rubbed bronze spray paint for the lamp itself and some old, messed up books that weren't readable anymore to jazz up the shade. 


I'm still not 100% in love with shade, but once my sunroom/library is finished, it may fit in better and I may fall wholly in love with it. However, I gotta say I like it better than before!

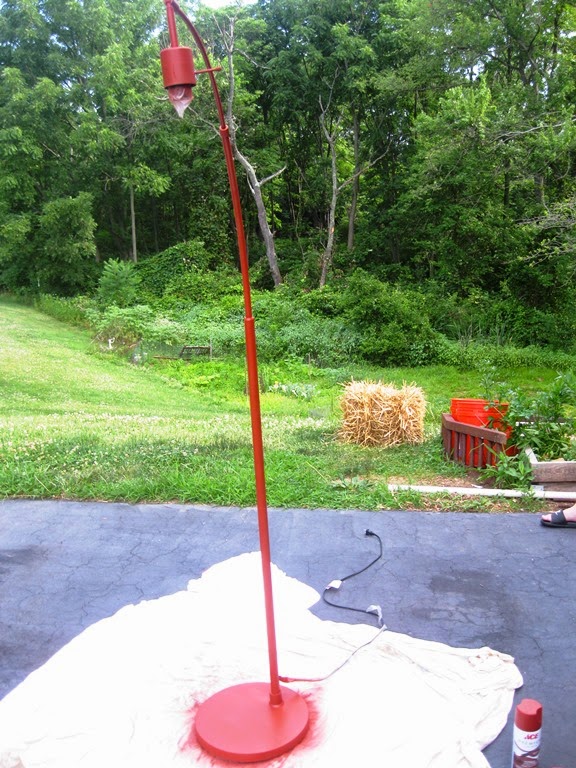
Painting the lamp was easy. After I taped off the cord and the socket, I just sanded the finish, wiped it with rubbing alcohol, primed it, lightly sanded it, primed it again, lightly sanded again, sprayed one coat, lightly sanded and sprayed a second coat. And, boom, that bad boy was DONE!


Now, the shade was another matter entirely. I carefully cut pages from my books, folded and pleated them, then sewed them together, right down the center of the pages.


You don't have to be precise with your folding and pleating. Just fold, pleat and sew and sew and sew until you have a long strip, long enough to wrap around your shade four or five times. 


This doesn't take nearly as long as you think! It probably took about 45 minutes of folding, pleating and sewing. Now onto gluing this seemingly endless strip of pages onto the shade...


Fold the strip in half and start gluing it down along the bottom edge of the shade. I used a hot glue gun, which turned out to be a saving grace, as you will soon see!  When you get to the end of the first row, cut your strip and glue the ends down. Then glue each row the same way to the top of the shade.


Now the shade is done and ready to put back on the lamp. UNLESS, you're too stupid to check which end of the shade is up BEFORE you start gluing. I was not that stupid, I just don't know up from down :)
If you remember, I used a hot glue gun, which made it much easier to fix my mistake. All I needed was a hair dryer. I used the hair dryer to melt the glue so I could gently pull the paper off and reuse it.


I did not use my heat gun because I was afraid it would get too hot and burn the paper. Then I'd have to redo all the folding, pleating, and sewing. Again. And I was not up for that. Plus, I hate wasting things. Fortunately, it all worked out. I got the paper off without tearing it, turned the shade right side up and re-glued the paper. Lesson learned.


I got a new lamp for my sunroom for free! All I needed was a little time and effort!

Until the next project, 
Chris :)