One day, as I was digging around the office/craft studio, I found the desktop from our old desk. The desk was shot, but the desktop was still in good shape so I saved it, hoping to find a good use for it someday. I figured that today was someday and I could make a desk for a lot cheaper than store bought. And with a lot more personality.
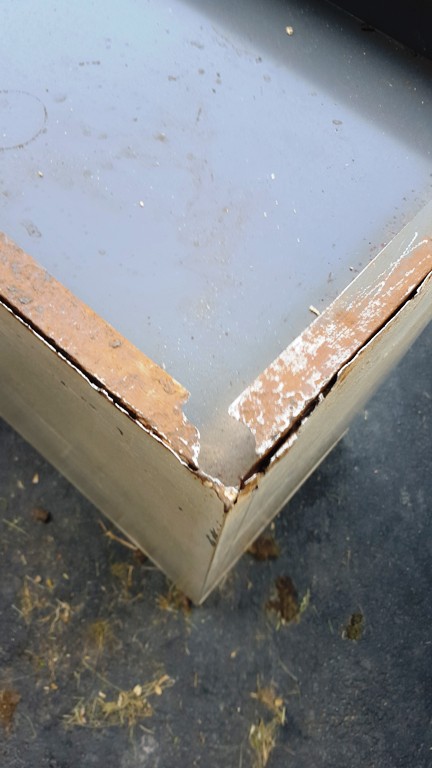
I searched craigslist and hit a nearby thrift store and found a filing cabinet for $10.00. Aw yeah! It was a little rusty in the the back, but the rest was in good shape and the back will be against the wall, right? I also found a 2 shelf bookcase I scored for $8.00! $18.00 for desk? I can get behind that! Now I had to decide what color to paint it. As I was checking my Facebook feed, I noticed a post about decoupage. Now that would be different. And fun! Hahahahahahaha! Fun, my butt. However, it turned out beautifully with loads of personality!


Isn't it cool! Brooke and I hit the craft stores looking for awesome scrapbook paper (which was on sale - boom shaka laka!) and we spent $8.00 on paper and decoupage glue, bringing the grand total to $26.00! Not too shabby, if you ask me...

Brooke fell in love with the flower paper and we got some purple and teal paper to complement the flowers. Now to start decoupaging! Easier said than done....
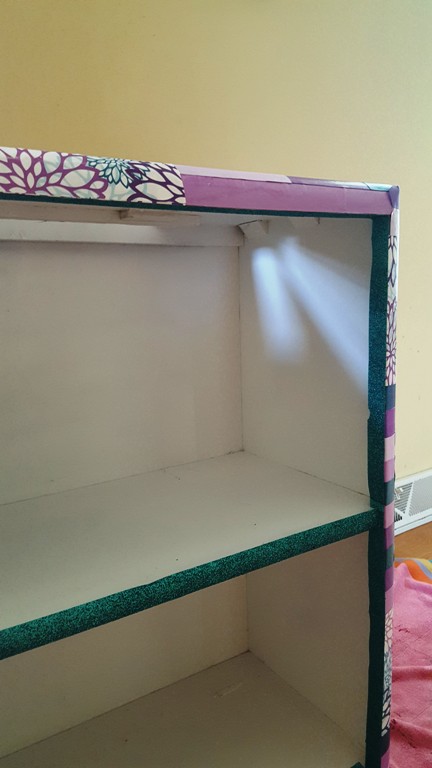
Now I've got everything but an idea. And that was a hurdle. I pondered and searched Pinterest and the internet. And finally found my inspiration on a quilters page! I've always wanted to quilt my own gorgeous, intricate, colorful quilt. But I am seriously lacking in patience and sewing skills. I figure recreating a quilt pattern with paper is as close as I'm gonna get. It took me several tries and reconfigurations until I got the look I wanted. I ended up doing 1 inch strips and 6 inch squares. I started with the bookcase. I sanded it down; just enough to rough up the surface. Then I sanded down the inside very well and spray painted the inside white, then got to decoupaging. I brushed glue on a small section of the bookcase and then on the back of the paper and smoothed the paper onto the bookcase, then brushed another layer of glue over the paper to seal it. About halfway down the first side, I realized that it was bubbling up.

If you look closely at the bottom half of this pic, you'll see where it's bubbling. I vented my frustrations, ripped the paper off, sanded it smooth, then went to the internet to see where I went wrong.
On my second try, I brushed a thin coat directly on the bookshelf, then smoothed the paper down, making sure the edges were glued down. I did this the whole way down the side, then waited for it to dry for an hour or two, then covered it with a thin coat of decoupage, waited another hour or two, then covered it with another thin coat, waited for another hour or two and then did the third and final thin coat. I wrapped the decoupage around the front edge which didn't work out so well. Maybe it was because the paper was thicker, but I had to press hard for thirty seconds and, in some cases, I had to go back with more glue.


I only did the sides because the back will be against the wall and the desktop will cover the top. I realized that I may someday want to move the desk elsewhere and the back may show. I have enough paper to finish the back when and if that day ever comes. I was a little too frustrated with the damn thing to do the back at this time. Plus, I still had the filing cabinet to do.
The paper that I wrapped around the front edge was NOT sticking down very well. So I cut the edges off and added glitter tape. I also added it around the front shelf and the bottom. After I stuck it down, I added two coats of decoupage glue. I am not thrilled with the glitter tape, but Brooke is and it's her desk, so, there you have it.

So now that's done, I can move on to the filing cabinet! The filing cabinet had rusty spots on it and the bottom back corner had a rusted out spot. I used a Dremel to smooth out the sharp edges on the rusted out spot and really sanded the bottom front, top and back. I sanded the sides and drawer fronts just enough to smooth out the bad paint job. Then I spray painted the bottom, front, top and back. Even though the top, bottom and back won't be seen, I wanted to cover the rusty spots and keep them from getting nasty.

I also took off the handles and the little knobs and hit them with white spray paint too. Two cans of spray paint set me back $8.00.
I decoupaged the drawer fronts, then turned my attention to the sides. I did have a little problem keeping the strips straight on the bookcase sides, so this time I drew lines to help keep my strips straight.

I absolutely LOVE the filing cabinet after! I wish I could've found two of these! But the bookcase offers more storage, so I guess it works out better.

I set the desktop on the filing cabinet and bookcase, then screwed the top down from the underside of the bookcase. I used two flat braces on either side of the back of the cabinet to hold the top. And, boom, we've got ourselves a desk!


I painted an old chair and some baskets teal to match the desk. I also saved the shelf that used to be the top of the desk (yes, I seriously saved it too) and mounted it above the desk using some old wrought iron brackets I painted white. I've been holding on to these puppies for, oh, about ten years now. I save a lot of stuff.
Now Brooke has an awesome, colorful desk with storage AND personality. And all it took was $34.00 and a little bit of effort. And some swearing.
Until the next project,
Chris :)