
I really like the multi-colored ones, but for my first try, I went with one color. Red. I love red. It's such a cheery, energetic color. You can use any kind of cardstock or heavy paper you wish. One of my favorite craft stores had scrapbook paper on sale 8/$1.00 (yowza!) and I used 16 pieces, so my wreath cost me $2.00. That's right, $2.00! You can't buy awesome like this for $2.00.

All you need is cardstock or heavy paper, glue (I personally like my glue gun) and an 8" or 9" cardboard circle (I cut one out of an old box using my cake pans as a template). I used my rotary cutter to cut my 12" x 12" sheets of paper into fourths, giving me 6" squares. Different tutorials cut the paper into different size squares. It doesn't matter how big your square is, as long as it's a square and NOT a rectangle. Now you need to roll each square into a cone. Which is not as easy as I was expecting. It took me four tries to get a good looking cone. Do not worry about making the bottom closed up like an ice cream cone. Mine were a little open, as you can see in the next picture. They kind of resemble a lopsided cannoli, without all the yummy, creamy, chocolate chip-studded filling. After I did my perfect cone, I couldn't get the next two to come out right, so I got the utterly brilliant idea to wrap the remaining squares around the perfect cone as kind of a mold. That way they all came out the same and life was good.
Next, I hot glued the cones around the edge of the cardboard circle.
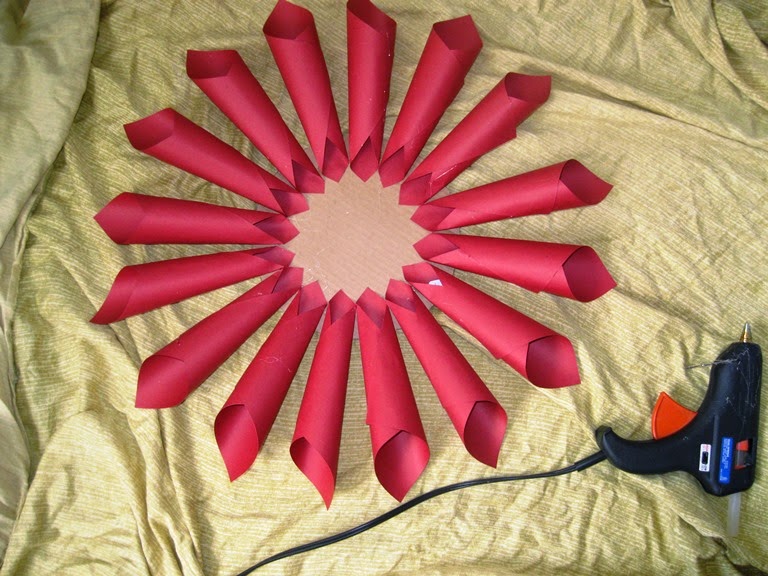
Then I did the second row, flattening and slightly bending the tip before I glued it down.

Now it's starting to look like a flower! I just continued flattening and bending the tips and gluing the cones in circles, until I got to the center and then I glued in the last three cones to form the center. I then realized I need a loop for hanging. I looked at the wreath from every angle, decided which was its best side (whatever you want to call it), made a kid hold it so I wouldn't crush it while I glued a hanging loop on the back.

I just used a piece leftover pink piping that was too little to use for another project, but was too big for me to justify tossing. Which was lucky for me because I don't have to use any of my good ribbon for this.
I absolutely LOVE the end result!

As soon as scrapbook paper goes on sale again (like I'm paying full price) I'm making one in sea glass colors for my sunroom! This was so easy (once I got the hang of making the damn cones) and super cheap! And it looks stunning!
Until the next project,
Chris :)