
I am making this for my girly girl out of two of her old t-shirts that were bunched up in the bottom of her dresser drawers. Since she obviously wasn't wearing them, why not make them into something cool? And, as I said before, I need a distraction from my children.


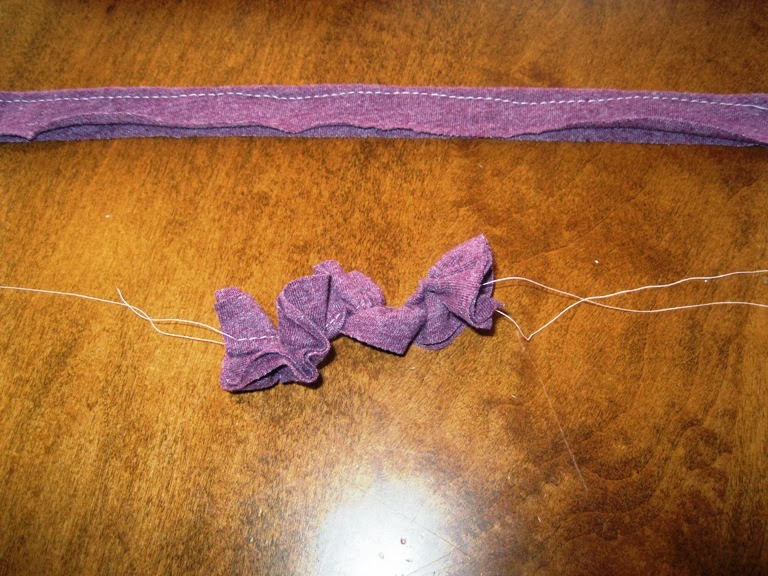

I rolled each strip up into a rose shape and stitched the bottom to keep it together. Now for the obscenities. Trying to hold the rose in place and stitch at the same time was an enormous pain in the butt. The center would suddenly pop out or I thought I was done only to realize I missed a spot so my rose looked like a japanese beetle snacked on it. After I ripped it apart and swore at it again, I came to the realization that it would be easier to stitch it as I rolled it up. It worked much better that way. I was happy.

Here is the finished rose. Pretty cool, right? Now to make more...

I wanted to add a few leaves to some of my roses, but the greens I have didn't look right with the gray and burgundy, so I decided to go goth and add black leaves. I snagged two strips from my t-shirt rug, cut out four leaf shapes and stitched them on four roses. I placed the roses around the neckline to see how it looked best, then stitched the roses to the collar of the shirt.

At this point, I wasn't sure I liked it! It didn't lay the way I wanted it to. But before I ripped everything apart in a frenzy of tears and self-recriminations, I had my girly girl try it on.

Once she had it on, I breathed a sigh of relief! It looked good! Of course, just about anything looks good on little Miss Size Two (yes, I am jealous). There was no need for crying or beating myself up. As a matter of fact, I may have to make more. One for me, maybe a couple for my Etsy store...hmmmm, I may need to go routing around for more t-shirts...
From the way it's snowing and blowing I don't think I'll be going anywhere anytime soon and judging from the way my little darlings are getting along, I will be back very soon with another craft for you!
Chris :)
No comments:
Post a Comment